Photometry Tutorial
In this page we will guide you through an example on how to run the photometry pipeline.
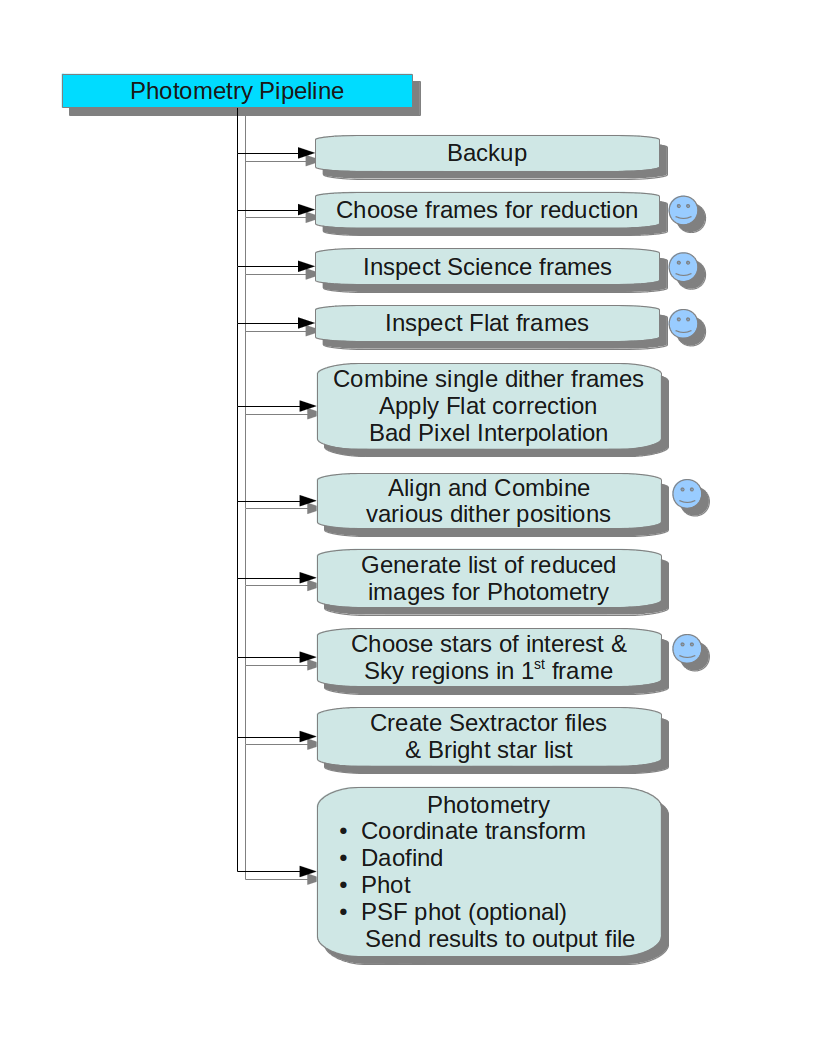
Each step in the following flowchart is split into independent tasks. The steps with human face need human interaction to run.
Obtaining Data
We will do photometry of Standard stars in AS40 field of Hunt et al 1998. You can download the data from here : TIRSPECTutorialData.tar.gz
Extract the tar.gz file and keep your nights in some location. Say ~/TIRSPECdata/
$ ls ~/TIRSPECdata/
20131102/ 20140212/
Also download and extract the latest version of the tirspec pipeline from here .
All the codes you need for pipeline are in CodesForUser/ directory in the downloaded pipeline tar ball.
Editing the .conf file
You can copy and rename the TIRSPECscript.conf file to ~/TIRSPECdata/TIRSPECscript_AS40.conf This will help you later find the configuration file you used for this particular reduction.
Open TIRSPECscript_AS40.conf in your favourite text editor and edit the following lines in it.
OUTPUTDIR= Photometry_of_AS40
OUTPUT= TIRSPECPhotometry_Of_AS40.txt
If you don't have emacs installed on your machine, you can also change the following line to your favourite editor. (See FAQ for more examples)
TEXTEDITOR= "vi"
Now, you are ready to run the pipeline. We will be reducing AS40 images in 20140212 directory.
You can open the file 20140212/SlopeimagesLog.txt to see the list of images we will be reducing.
Starting the pipeline
You have to run the pipeline code from the directory which contains directory of nights.
$ cd ~/TIRSPECdata/
Run the TIRSPECdataReduction.py in this directory with TIRSPECscript_AS40.conf as the first argument.
$ TIRSPECdataReduction.py TIRSPECscript_AS40.conf
You should see a following output, requesting you to enter the list of tasks to run
___________._____________  _______________________________________
\__    ___/|   \______   \/   _____/\______   \_   _____/\_   ___ \
  |    |   |   ||       _/\_____  \  |     ___/|    __)_ /    \  \/
  |    |   |   ||    |   \/        \ |    |    |        \     \____
  |____|   |___||____|_  /_______  / |____|   /_______  / \______  /
                       \/        \/                   \/         \/

                                          Data Reduction Pipeline...

----------
IMP: All outputs of this run will be written to the directory /home/joe/TIRSPECdata/Photometry_of_AS40

Very Very Important: Backup your files first. Don't proceed without backup.

 ---------------- Welcome to TIRSPEC Photometry Script ---------------

Enter the Serial numbers (space separated if more than one task in succession)

0  Backup files in current directory to ../DataBackup

1  Selection of object frames, Flats/Sky/Argons to reduce

2  Manually inspect and reject object images by displaying one by one to classify

3  Manually inspect and reject Flats/Sky/Argons by displaying one by one

4  Combine images in a Dither [,subtract sky], apply Flat Correction and Bad pixel interpolation

5  Align and combine combined images of each Dither in Photometry data

6  Make the list of images, Images4Photo.in to do Photometry

7  Select Stars and Sky region of the field on first image

8  Create Sextracter config file & coordinate output of first image in this directory

9  Do Photometry

---------------------------------------------------------------

Steps you have already finished : Nothing...
Enter the list :
Task 1 (Selection of frames to reduce)
Here we shall start with the first task 1 (You can also give all the tasks 1 2 3 4 5 6 7 8 9 together, but for this tutorial we shall run one at a time.)
Enter the list : 1

RUNNING TASK:1  Selection of object frames to reduce

Enter the directories to analyse (default: 20131102,20140212) :
Here we enter all the directories your target source was observed in comma separated format. Right now we have only one night data
Enter the directories to analyse (default: 20131102,20140212) : 20140212
----------
For Regular Expression rules See: http://docs.python.org/2/howto/regex.html#regex-howto
Some examples of typical input are shown below
 .*M31.*   is the regular expression to select all the filenames which has "M31" in it.
 .*M31.*sky.*   is to select all the filenames which has both "M31" and then "sky" in it.
While selecting Argon, Flat etc, you can give a range of filenumbers to uniquely choose specific files
 .*Continu.* 140 190   is to select all filenames of _same_ filter which has "Continu" in it and has a filenumber in the range of 140 to 190
----------
Enter Regular Expression to select the objects from all dirs:
This is the stage where it asks for the regular expression to find your target filenames
Enter Regular Expression to select the objects from all dirs: .*AS40.*

Working on night : 20140212
Below in addition to regexp, if needed you can enter the starting and ending filenumbers separated by space also.
Enter Regular Expression for the flat of filters ('H', 'OPEN', 'OPEN') (default: .*AS40.*) :
Now it will ask for the regular expression to find the flats of each filter one after other. It will ask you for all the filters your source was observed in each night. You can either use the target frames itself for flat fielding, or in this tutorial we shall use separately observed twilight flat frames.
Enter Regular Expression for the flat of filters ('H', 'OPEN', 'OPEN') (default: .*AS40.*) : *.Flat.*
Enter Regular Expression for the flat of filters ('J', 'OPEN', 'OPEN') (default: .*AS40.*) : *.Flat.*
Enter Regular Expression for the flat of filters ('KS', 'OPEN', 'OPEN') (default: .*AS40.*) : *.Flat.*
Edit, save (if required) and close the Flat/Argon/Sky list associations for this night :20140212
Press Enter to continue...
After you press enter, it will open a text file with first column containing your target filenames and the remaining columns the associated flat frames which will be used.
You can close this file and the pipeline will continue to execute the remaining tasks, The file table is shown at this stage just so that you can verify everything is proceeding as you expected. If you feel like changing something, before closing, make the changes and save the file.
At the end of each run of pipeline it will print
All tasks over....Enjoy!!!
Task 2 (Manually inspect and accept/reject object images)
Rerun the previous command, but this time when it prompts for the task to execute give 2
Enter the list : 2
RUNNING TASK:2  Manually inspect and reject object images by displaying one by one to classify

Enter the directories to analyse (default: 20140212) :
You can press Enter to accept the default It will start opening you target source raw images one by one image in ds9.
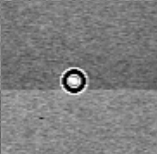
Press a and then q over one good central star for selecting image.
In case a bad frame comes up, Press q without pressing a to discard the image.
Once all images in that night are over, it will display all the images as set of paragraphs in text editor, you can add or delete space in between them if you need to manually edit the detected dithered sets.
We have made the selected list of images in /home/joe/TIRSPECdata/Photometry_of_AS40/20140212/AllObjects2Combine.List
Add blank lines between file names to prevent them from median combining.
Remove the blank line between file names, which you want to combine.
Press Enter to continue...
Task 3 (Manually inspect and accept/reject Flats/Sky/Argons)
Enter the list : 3
RUNNING TASK:3  Manually inspect and reject Flats/Sky/Argons by displaying one by one
Enter the directories to analyse (default: 20140212) :


Working on night : 20140212
-*--*--*--*--*--*--*--*-
Files in:/home/joe/TIRSPECdata/Photometry_of_AS40/20140212/AllObjects-Flat.List
-*--*--*--*--*--*--*--*-
-----
To skip all the remaining verifications, you can enter following two options
acceptall       # Accept all remaining images in this night
acceptallnights # Accept all images in all remaining nights
Use the above two options only when you are sure all the images are good. Do not use them if you are not sure.
-----
For the science image: Slope-AS40-??.fits
z1=16.55243 z2=26.27585
20140212/Flat-J-*.fits
Enter "r" to reject, "ra" to reject always in future, "aa" to always accept in future:
At this stage it will also display images one by one, You can give acceptall to accept all the flats blindly of this night, acceptallnights to accept all flats from all nights.
To be safe, type aa to accept the displayed image.
Tip: Use up arrow to get previously typed entry.
Task 4 (Combine images in a Dither, apply Flat , Sky correction, Bad pixel interpolation)
Enter the list : 4
RUNNING TASK:4  Combine images in a Dither [,subtract sky], apply Flat Correction and Bad pixel interpolation
It will automatically do Flat correction, sky subtraction if you had asked for it, and also combine images in each dither position.
Task 5 (Align and combine dithers)
Enter the list : 5
RUNNING TASK:5  Align and combine combined images of each Dither in Photometry data

Press _a_ over a few (~ 4 or 5) good stars to align, u can press s also, but DONT press r
For each set of filter in a night it will display the first dither position image and you have to press a over a few good stars. These star's coordinates will be used for automatically aligning remaining frames of that night in that that filter.
So after selecting a few stars you can press q to continue to next filter/night data.
Task 6 (Final Reduced Images list)
Enter the list : 6
RUNNING TASK:6  Make the list of images, Images4Photo.in to do Photometry
If all you wanted was final reduced images you can stop at this task, you need to proceed further if you need to do photometry of the sources in the field.
Task 7 (Selecting objects of interest)
Enter the list : 7
RUNNING TASK:7  Select Stars and Sky region of the field on first image
Task 8 (Create Sextractor and bright star list files)
Enter the list : 8
RUNNING TASK:8  Create Sextracter config file & coordinate output of first image in this directory
Task 9 (Do Photometry)
Enter the list : 9
RUNNING TASK:9  Do Photometry
The output file Photometry_of_AS40/TIRSPECPhotometry_Of_AS40.txt will be created with a summary of the instrumental magnitudes.
A full output including errors etc in machine readable format with | delimiter will be written to Photometry_of_AS40/TIRSPECPhotometry_Of_AS40.txt_FullOutput.txt . You can open this file in libreoffice calc with delimiter other=| to read the content of the output in a tabular form.
LibreOffice Calc Tip: Use Data->Filter->AutoFilter to select the outputs based on filter. This is extremely useful while dealing with many nights of data.